Rabu, 20 November 2024

Floating Shelves for Living Rooms: Display Your Favorite Decor

,
Floating Shelves for Living Rooms: Display Your Favorite Decor

Floating Shelves for Living Rooms: Display Your Favorite Decor

Let's face it, a blank wall is kind of a downer. It's like that awkward silence in a conversation, just waiting for something interesting to happen. But fear not, because floating shelves are here to rescue your wall from the doldrums and unleash your inner interior designer!

Floating shelves are a modern and versatile way to add personality and visual interest to your living room. They're like blank canvases, begging for your favorite books, plants, art, and decorative treasures to take center stage. But, with so many options out there, where do you even begin? Don't worry, we've got you covered.

In this guide, we'll explore the wonderful world of floating shelves, from choosing the perfect style and size to styling them like a pro. Get ready to unleash your creative side and transform your living room into a haven of style and personality.

Why Choose Floating Shelves?

Floating shelves offer a host of benefits that make them a popular choice for living room decor:

  • Space-Saving: Unlike bulky bookshelves, floating shelves hug the wall, maximizing floor space and giving your room a more airy feel.
  • Versatility: They're perfect for displaying various items, from books and plants to artwork and decorative accents.
  • Easy Installation: They typically come with simple installation instructions, making them a DIY-friendly project. You can also find a variety of mounting options, like brackets or hidden clips, depending on your preference and the weight you plan to put on them.
  • Aesthetic Appeal: Floating shelves offer a sleek and modern look, adding a touch of sophistication to your living room. They can be minimalist or eclectic, depending on your style preferences.

Choosing the Right Floating Shelves

Now comes the fun part: selecting the perfect floating shelves to complement your living room's style and functionality. Consider these factors:

Size and Shape:

The size and shape of your shelves should be proportional to the wall space you're working with. A narrow shelf might look cramped on a large wall, while a wide shelf could overwhelm a smaller space.

Pro Tip: If you're struggling with proportions, think about the "rule of thirds." Divide your wall into three equal sections, horizontally and vertically. This creates a visual grid that can guide your shelf placement for a balanced look.

Material:

Floating shelves are available in a variety of materials, each with its unique aesthetic:

  • Wood: A classic choice for a natural, warm look. Choose from various woods like oak, maple, walnut, and reclaimed wood for a rustic feel.
  • Metal: Sleek and modern, metal shelves offer a contemporary vibe. Choose from steel, iron, or brass for a sophisticated touch.
  • Glass: Creates a light and airy feel, ideal for showcasing smaller items or adding a touch of elegance. Be mindful of the weight limit with glass shelves.
  • Acrylic: Similar to glass, acrylic shelves provide a transparent look, making them ideal for displaying objects without obstructing the background.

Color and Finish:

The color and finish of your shelves should complement your existing decor. Consider these options:

  • Natural Wood Tones: Offer warmth and a classic feel, blending seamlessly with various styles.
  • Painted Colors: Allow you to add a pop of color to your living room. Choose a color that complements your furniture and walls.
  • Metallic Finishes: Add a touch of glamour and sophistication, particularly well-suited for modern or contemporary decor.

Styling Floating Shelves Like a Pro

Now that you've chosen your perfect floating shelves, it's time to turn them into a stylish focal point in your living room.

Create a Focal Point:

Choose one or two items to act as the centerpieces on your shelves. These could be a piece of artwork, a sculpture, or a large plant. Position them at the center of the shelf or strategically placed on either side to create visual balance.

Embrace Height and Depth:

Don't be afraid to play with height and depth by adding items of varying sizes and textures. Tall vases, stacked books, or a combination of framed prints and greenery will add interest and visual appeal.

Layer and Group:

Group items together to create visual cohesion. A cluster of small decorative objects, like candles, figurines, or small plants, can be placed on one shelf, while a larger item, such as a framed photo or a book, takes center stage on another.

Incorporate Texture and Color:

Don't be afraid to experiment with different textures and colors. Combine smooth ceramics with woven baskets, metallic accents with natural wood, or vibrant blooms with neutral tones. The key is to create a balanced and visually appealing display that reflects your personal style.

Leave Space to Breathe:

Remember, less is more! Don't overcrowd your shelves. Leave some space between items to allow the eye to rest and appreciate each object. This creates a sense of balance and avoids a cluttered look.

Floating Shelves: A DIY Project?

Feeling crafty? You can definitely build your own floating shelves! It's a fun and rewarding project that allows you to customize the look and size to perfectly fit your space.

Here are some basic steps for building your own floating shelves:

  • Gather your materials: You'll need wood boards, brackets or mounting hardware, screws, wood stain or paint, and a tape measure.
  • Measure and cut your boards: Determine the length and width of your shelves and cut the wood boards accordingly. Use a saw or ask your local hardware store to cut them for you.
  • Sand and finish: Sand the edges of the boards to create a smooth surface. Stain or paint them to match your desired finish.
  • Mount the brackets: Position the brackets on the wall and attach them securely using screws. Make sure they are level and securely mounted to support the weight of your shelves.
  • Attach the shelves: Carefully place the shelves onto the brackets and ensure they are level. Use screws to secure the shelves to the brackets.

Commonly Asked Questions

Can I use floating shelves in a small living room?

Absolutely! Floating shelves are a great way to add storage and style to a small living room without taking up valuable floor space.

How do I make sure my floating shelves are securely mounted?

Always use high-quality mounting hardware and follow the manufacturer's instructions. Choose brackets that are appropriate for the weight of the shelves and items you plan to display. Consider using stud finders to locate studs in your walls for added support.

What are some creative ways to style floating shelves?

Think outside the box! You can use floating shelves to display anything from plants and books to artwork and collectibles. Get creative with your styling and make it your own!

There you have it! You're now equipped with the knowledge and inspiration to create a stunning and functional living room with floating shelves. So, grab your favorite decor and get ready to unleash your inner design guru!

Read more

Selasa, 19 November 2024

How to Market and Sell Your Handmade Blanket Ladders

,
How to Market and Sell Your Handmade Blanket Ladders

Marketing and Selling Your Handmade Blanket Ladders

In the realm of handcrafted home decor, blanket ladders have emerged as a stylish and functional solution for organizing and showcasing throws, blankets, and other textile treasures. If you're a skilled artisan with a passion for creating beautiful and practical items, crafting and selling handmade blanket ladders presents a unique opportunity to tap into a growing market. This comprehensive guide will equip you with the knowledge and strategies to effectively market and sell your handcrafted creations.

Defining Your Target Audience and Niche

Before diving into marketing, it's crucial to identify your target audience. Blanket ladders appeal to a diverse demographic, but understanding their specific needs and preferences will help you refine your marketing efforts.

Potential Customer Profiles

  • Home Decor Enthusiasts: These individuals are passionate about creating a stylish and inviting home environment and appreciate the aesthetic appeal of blanket ladders.
  • Minimalists and Organized Individuals: Blanket ladders offer a practical solution for decluttering and organizing living spaces, making them attractive to those who value simplicity and functionality.
  • DIY and Craft Lovers: Some customers may be interested in purchasing a completed ladder while others may prefer to build their own, creating a niche for providing DIY kits or plans.
  • Parents and Families: Blanket ladders can be a convenient way to store children's blankets and throws, making them appealing to families.

Crafting a Compelling Brand Identity

A strong brand identity will help your business stand out in a competitive market. Consider these elements:

Brand Name and Logo

Choose a name that reflects the essence of your products and resonates with your target audience. A memorable logo should visually represent your brand's personality.

Brand Story and Values

Develop a compelling narrative that highlights the craftsmanship, passion, and unique selling points of your handmade blanket ladders. Communicate your brand's core values, such as sustainability, ethical sourcing, or a commitment to quality.

Visual Style

Establish a consistent visual style for your website, social media presence, and marketing materials. Use high-quality photography to showcase your ladders in attractive settings.

Online Marketing Strategies

The internet offers a powerful platform for reaching potential customers. Here's how to leverage online marketing:

Ecommerce Website

An online store is essential for selling your blanket ladders. Choose a user-friendly platform that allows you to showcase your products, process orders, and manage inventory efficiently. Consider incorporating high-quality product photography, detailed descriptions, and customer reviews.

Social Media Marketing

Utilize platforms like Instagram, Pinterest, and Facebook to engage with your target audience. Share eye-catching visuals of your blanket ladders in different settings, offer behind-the-scenes glimpses of your crafting process, and run promotions and giveaways.

Content Marketing

Create valuable content that educates and inspires your audience. Blog posts, articles, or video tutorials on topics like styling blanket ladders, DIY projects, or the benefits of using natural materials can attract potential customers.

Search Engine Optimization (SEO)

Optimize your website and online content for relevant keywords to improve your search engine rankings. This will make it easier for potential customers to find your products when they're searching online.

Paid Advertising

Consider running paid advertising campaigns on social media platforms or search engines to reach a wider audience. Target your ads to specific demographics and interests to ensure maximum impact.

Offline Marketing Channels

Don't underestimate the power of traditional marketing channels.

Craft Fairs and Markets

Participating in craft fairs and markets allows you to connect with potential customers in person, showcase your products, and gather valuable feedback. Be sure to have a well-designed booth that highlights your brand identity and attracts attention.

Local Partnerships

Collaborate with local businesses, such as home decor stores, gift shops, or interior designers, to sell your blanket ladders or offer them as part of curated gift baskets.

Word-of-Mouth Marketing

Encourage satisfied customers to spread the word about your products. Offer referral programs or incentivize customers to share their experiences on social media.

Providing Exceptional Customer Service

Outstanding customer service is crucial for building loyalty and repeat business.

Prompt and Personalized Communication

Respond to inquiries promptly and provide personalized assistance to customers. Offer clear and concise information about your products, shipping policies, and return procedures.

Packaging and Presentation

Package your blanket ladders carefully to ensure they arrive safely and in pristine condition. Consider adding a personal touch, such as a handwritten thank-you note or a small gift, to create a memorable experience.

After-Sales Support

Provide ongoing support to customers after they've purchased your products. Address any concerns or questions promptly and ensure their satisfaction.

Pricing Your Handmade Blanket Ladders

Pricing your products is a delicate balancing act between profitability and customer appeal. Consider the following factors:

Cost of Materials

Calculate the cost of all materials used in creating your blanket ladders, including wood, hardware, paint, and finishes.

Labor Costs

Factor in your time and effort, considering the hours spent designing, crafting, and finishing each ladder.

Market Research

Research the prices of similar products in your market to determine a competitive price point. Consider offering different price tiers based on size, materials, or customization options.

Profit Margin

Set a profit margin that allows you to cover your expenses and make a reasonable profit on each sale.

Continuous Improvement

The world of craft and design is constantly evolving. To stay ahead of the curve, consider these strategies:

Product Development

Introduce new designs, sizes, or materials to expand your product offerings and cater to changing customer preferences.

Market Trends

Stay informed about the latest trends in home decor, design, and consumer preferences to adjust your product offerings accordingly.

Feedback and Reviews

Actively solicit and incorporate feedback from customers and industry professionals to improve your designs, production processes, and customer service.

By following these guidelines, you can effectively market and sell your handmade blanket ladders, turning your passion into a thriving business. Remember to focus on creating high-quality products, building a strong brand identity, utilizing diverse marketing channels, and providing exceptional customer service. With dedication and a commitment to continuous improvement, you can achieve success in the world of handcrafted home decor.

Read more

Senin, 18 November 2024

How to Build Wooden Toys with a Unique Twist for Market Appeal

,
How to Build Wooden Toys with a Unique Twist for Market Appeal

Building Wooden Toys with a Unique Twist: Crafting Market Appeal

So you've got the wood, the tools, and a passion for crafting beautiful things. You've also got a love for kids and a desire to create toys that spark their imagination. But how do you stand out in a crowded market where plastic toys are often cheaper and more readily available? The answer lies in embracing the inherent beauty and charm of wood and crafting toys with a unique twist that will capture hearts and wallets.

Think Beyond the Basics: Finding Your Niche

The key to success is to carve out your own space in the toy market. Forget about mass-produced, generic wooden toys. Instead, focus on what makes your work stand out. Here are some ways to discover your niche:

Embrace a Specific Theme

Are you passionate about dinosaurs, space travel, or whimsical fairies? Choosing a specific theme allows you to create a cohesive collection of toys that appeal to a particular audience. This might involve designing a set of wooden dinosaur figurines, a spaceship with movable parts, or a fairy house with intricate details. The possibilities are endless!

Highlight Sustainability and Eco-Consciousness

Parents are increasingly concerned about the environmental impact of their purchases. By using sustainable wood and eco-friendly finishes, you can tap into this growing market. Highlight the benefits of natural materials and the durability of wooden toys, emphasizing their ability to be passed down through generations.

Focus on Educational Value

Wooden toys can be much more than just playthings. Design toys that encourage creativity, problem-solving, and fine motor skills. This could involve creating a set of building blocks with unique shapes, a wooden puzzle with hidden messages, or a musical instrument that allows kids to explore different sounds. The possibilities are endless!

Crafting a Unique Aesthetic: Adding That Extra "Wow"

Now that you've got your niche, it's time to work on the visual appeal of your toys. Here's where you can really let your creativity shine!

Master the Art of Carving and Detailing

Wooden toys are all about texture and detail. Invest in high-quality wood carving tools and learn to create intricate patterns, unique shapes, and expressive faces. The more detail you add, the more captivating your toys will become.

Embrace Colour and Finish

While natural wood has its own beauty, don't shy away from adding pops of colour. Use eco-friendly paints and stains to create vibrant, eye-catching designs. You could even incorporate elements like hand-painted details, decoupage techniques, or even natural pigments for a truly unique look.

Incorporate Personal Touches

Let your personality shine through in your designs. This could involve adding whimsical details, incorporating your own artwork, or even personalizing toys with a child's name or a special message. These unique touches will help your toys stand out and create a more personal connection with customers.

Marketing Your Wooden Toys: Reaching Your Audience

You've crafted some amazing wooden toys, but now you need to get them in front of the right people. Here are some effective marketing strategies:

Build a Strong Online Presence

Create a website or an Etsy shop to showcase your work. Use high-quality photos and compelling descriptions to highlight the unique features of your toys. Invest in professional photography to really capture the beauty of your craft.

Engage on Social Media

Instagram, Facebook, and Pinterest are great platforms for showcasing your work. Share photos of your toys, behind-the-scenes glimpses of your workshop, and customer testimonials. Run contests and giveaways to engage your audience and create buzz around your brand.

Partner with Other Businesses

Collaborate with independent toy stores, children's boutiques, or even local makers markets to expand your reach. You could also partner with bloggers or influencers who cater to parents and kids to promote your toys to a wider audience.

Attend Craft Fairs and Markets

Get your toys out there by attending local craft fairs, holiday markets, or children's events. This allows you to connect with potential customers face-to-face and generate immediate sales.

Building a Sustainable Business: Tips for Growth

Creating a successful business selling handcrafted wooden toys takes time, effort, and a strategic approach. Here are some tips to keep in mind:

  • Set Realistic Goals: Start small and gradually scale your business as you gain experience and customer base.
  • Manage Your Time: Create a schedule that balances your crafting time, marketing efforts, and business administration tasks.
  • Price Your Products Competitively: Consider your production costs, materials, and time invested to set a fair price that reflects the value of your handmade toys.
  • Provide Excellent Customer Service: Respond promptly to inquiries, offer personalized recommendations, and ensure customer satisfaction.
  • Continuously Learn and Adapt: Keep an eye on market trends, experiment with new designs, and refine your craft to stay ahead of the game.

Commonly Asked Questions

Here are some frequently asked questions about building wooden toys:

What kind of wood is best for making toys?

Hardwoods like maple, cherry, and walnut are durable and beautiful, but they can be expensive. Softwoods like pine and cedar are more affordable but less durable. Consider the specific needs of your toy when choosing wood.

What tools do I need to get started?

You'll need basic woodworking tools like saws, hammers, chisels, sanders, and a drill. You may also want to invest in a wood lathe for turning shapes and a band saw for more intricate cuts.

Where can I find resources and inspiration?

There are many online resources, books, and workshops dedicated to woodworking and toy making. Check out websites like Instructables, Pinterest, and YouTube for tutorials, ideas, and inspiration.

How do I make sure my toys are safe for children?

Use non-toxic finishes and paints. Ensure that all edges are smooth and rounded to prevent splinters. Avoid using small parts that could be a choking hazard. Follow safety guidelines and regulations for toy production.

By following these tips and embracing your creativity, you can build wooden toys that are not only beautiful and durable but also uniquely appealing to parents and children alike. Remember, it's not just about crafting toys; it's about creating joy and sparking imagination in the hearts of little ones.

Read more

Rabu, 13 November 2024

Rustic Woodworking Projects for a Cozy Christmas

,
Rustic Woodworking Projects for a Cozy Christmas

Rustic Woodworking Projects for a Cozy Christmas

As the air turns crisp and the leaves fall, the holiday season begins to bloom. There's something magical about the anticipation of Christmas, and what better way to enhance that feeling than with the warm glow of rustic woodworking projects? This year, embrace the spirit of the season by crafting unique and charming pieces that will fill your home with warmth and holiday cheer.

Charming Christmas Decorations

Imagine a mantelpiece adorned with handcrafted ornaments, each one telling a story of your creative spirit. Or perhaps a tabletop centerpiece that radiates rustic elegance, drawing family and friends together. These woodworking projects are not just decorations, they are tangible expressions of your love for the holiday season.

Rustic Wooden Ornaments

Let your creativity run wild with rustic wooden ornaments. Cut shapes like stars, snowflakes, or even whimsical reindeer from scrap wood. Add a touch of charm with paint, stain, or even natural elements like dried berries or pinecones. You can also personalize them with initials, dates, or special messages.

Wooden Advent Calendar

Create a unique and delightful advent calendar using rustic wood. You can build a simple box with numbered drawers or use individual wooden blocks to create a charming display. Fill each compartment with treats, small gifts, or inspiring messages to count down the days until Christmas.

Wooden Candle Holders

Craft rustic candle holders to illuminate your holiday gatherings. Use reclaimed wood to create rustic candle lanterns, or simply cut out simple shapes like stars, hearts, or snowflakes to create elegant candle holders. The warm glow of candlelight will enhance the cozy ambiance of your holiday decor.

Rustic Wooden Gifts

Don't just buy gifts this year, create them! With your woodworking skills, you can craft personalized and heartfelt presents that your loved ones will treasure for years to come. Each piece will be infused with your love and care, making them even more special.

Wooden Serving Trays

A rustic wooden serving tray is a practical and beautiful gift. Choose a sturdy wood like oak or maple and add a decorative touch with a simple design or a hand-painted inscription. The recipient can use it for serving appetizers, drinks, or even displaying small plants or decorative items.

Personalized Wooden Boxes

Create a special wooden box to store keepsakes, jewelry, or other treasures. Use a variety of woods and stains to give each box a unique look. You can even add a personalized inscription or engraving to make it even more special. This is a thoughtful and practical gift that will be appreciated for years to come.

Wooden Cutting Boards

A personalized wooden cutting board is a practical and stylish gift. Choose a wood like cherry or walnut for a beautiful and durable cutting surface. You can add a decorative edge, an engraved name, or a simple design to give it a unique touch. This is a gift that will be used and treasured by any home cook or baking enthusiast.

This holiday season, go beyond the traditional and embrace the beauty of rustic woodworking. Create personalized decorations, thoughtful gifts, and charming home accents that will fill your home with warmth and holiday cheer. Let your creativity flow, and discover the joy of bringing the spirit of Christmas into your home through handcrafted woodworking projects.

Read more

Selasa, 12 November 2024

Free PDF Plans for DIY Coffee Table Projects

,
Free PDF Plans for DIY Coffee Table Projects

Free PDF Plans for DIY Coffee Table Projects

Building your own coffee table is a rewarding and cost-effective project that can add a personalized touch to your living space. With readily available materials and detailed plans, crafting a coffee table can be a fun and achievable DIY endeavor. There are numerous free PDF plans available online, offering a wide range of styles and designs to suit every taste and skill level.

Benefits of DIY Coffee Table Projects

Building your own coffee table comes with several advantages:

  • Cost Savings: You can save a significant amount of money compared to purchasing a pre-made coffee table.
  • Customization: You have complete control over the size, shape, materials, and finishes to create a table that perfectly matches your decor and needs.
  • Sense of Accomplishment: Completing a DIY project provides a sense of pride and satisfaction.
  • Unique Style: A handcrafted coffee table adds a unique and personal touch to your living room.

Where to Find Free PDF Plans

There are various online resources that offer free PDF plans for DIY coffee table projects. Some popular options include:

  • Ana White: Ana White's website is a treasure trove of free woodworking plans, including numerous coffee table designs. She provides detailed instructions, cut lists, and diagrams to guide you through the process.
  • Pinterest: Pinterest is an excellent source of inspiration and project ideas. Search for "DIY coffee table plans" to find a wealth of options, including many with downloadable PDF plans.
  • Instructables: Instructables is a community-driven platform where users share their DIY projects, including detailed instructions and downloadable plans for coffee tables.
  • Free Woodworking Plans: Websites dedicated to woodworking plans, such as Free Woodworking Plans and Woodworking for Mere Mortals, often feature free plans for coffee tables.

Choosing the Right Plan

When selecting a free PDF plan, consider the following factors:

  • Skill Level: Choose a plan that aligns with your woodworking experience. Beginners may start with simpler designs, while experienced builders can tackle more complex projects.
  • Style: Consider your existing decor and choose a plan that complements your style. From rustic farmhouse to modern minimalist, there's a coffee table design for every taste.
  • Materials: Evaluate the materials listed in the plan and ensure they are readily available and within your budget.
  • Time Commitment: Factor in the time required for the project, including material gathering, cutting, assembly, and finishing.

Building Your Coffee Table

Once you've chosen your plan, gather the necessary tools and materials. Carefully review the instructions and diagrams. Start by cutting the wood to the specified dimensions, then assemble the pieces according to the plan. Pay close attention to the joinery techniques and ensure accurate measurements for a sturdy and well-constructed table.

Finishing Touches

After assembling the coffee table, you can personalize it with finishing touches. Sand the surface smooth, apply a stain or paint for a desired color, and seal the wood with a protective finish. You can add hardware, such as drawer pulls or casters, to enhance the functionality and style.

Enjoy Your New Coffee Table

With a little effort and the right plan, you can build a beautiful and functional coffee table that will serve as a centerpiece in your living room. Enjoy the satisfaction of a successful DIY project and the unique charm of a handcrafted piece of furniture.

Read more

Practical Bedside Cabinet Projects for New Woodworkers

,
Practical Bedside Cabinet Projects for New Woodworkers

Practical Bedside Cabinet Projects for New Woodworkers

Embarking on your woodworking journey can be both exciting and daunting. Choosing the right project is crucial for building confidence and honing your skills. Bedside cabinets, with their relatively simple designs and practical utility, offer an excellent starting point for new woodworkers. This article will guide you through several bedside cabinet projects, progressively increasing in complexity, helping you gain experience and create beautiful, functional pieces for your home.

Basic Bedside Cabinet: A Straightforward Start

This project is perfect for beginners, focusing on fundamental woodworking techniques like cutting, joining, and finishing.

Materials

  • Plywood or solid wood boards (for sides, top, bottom, and shelves)
  • Wood glue
  • Screws
  • Wood filler (optional)
  • Sandpaper (various grits)
  • Wood stain or paint
  • Finishing sealant (varnish or polyurethane)
  • Hardware (hinges, drawer slides, knobs)

Steps

  1. Design and Cut: Sketch a simple rectangular design, considering desired dimensions and shelf arrangement. Cut the pieces to size using a saw (circular or jigsaw).
  2. Assembly: Join the sides, top, and bottom using wood glue and screws. Use clamps to secure the pieces while the glue dries.
  3. Shelves: Cut and install shelves within the cabinet, ensuring they are securely fastened.
  4. Finishing: Fill any gaps or imperfections with wood filler, allowing it to dry completely. Sand the entire cabinet, starting with coarser grits and gradually moving to finer ones for a smooth finish. Apply your chosen stain or paint, followed by a protective sealant.
  5. Hardware: Attach hinges for any doors, install drawer slides if applicable, and fix knobs or handles.

Mid-Level Bedside Cabinet: Adding Curves and Details

This project introduces more intricate details, such as curved panels or decorative moldings. While slightly more demanding, it allows you to experiment with shaping and adding aesthetic appeal.

Materials

  • Solid wood (for sides, top, bottom, and shelves)
  • Wood glue
  • Screws
  • Wood filler
  • Sandpaper (various grits)
  • Wood stain or paint
  • Finishing sealant
  • Router (for curved panels or decorative elements)
  • Molding (for trim)
  • Hardware

Steps

  1. Design and Cutting: Sketch your design, incorporating curves for the front panels or sides. Cut out the basic pieces, leaving extra material for shaping.
  2. Shaping: Use a router with appropriate templates or guides to create the desired curves. Take your time and work slowly to achieve accurate and smooth results.
  3. Assembly: Join the curved panels with the straight sides, ensuring proper alignment. Use wood glue and screws for a sturdy bond.
  4. Molding: Cut and attach decorative molding to the cabinet's edges or any other desired locations, adding visual interest and framing elements.
  5. Finishing: Fill any gaps, sand thoroughly, and apply your chosen stain or paint. Finish with a protective sealant.
  6. Hardware: Install hinges for doors, drawer slides, and knobs or handles.

Advanced Bedside Cabinet: Exploring Techniques and Design

This project allows you to delve into more advanced techniques and personalize your design. You can explore dovetail joints, intricate carving, or unique hardware.

Materials

  • Solid wood (for all components)
  • Wood glue
  • Dovetail jig or router (optional)
  • Chisels (for carving)
  • Sandpaper (various grits)
  • Wood stain or paint
  • Finishing sealant
  • Hardware (including unique or custom-made pieces)

Steps

  1. Design and Planning: Create a detailed design, incorporating your desired elements, such as dovetail joints, carved details, or custom hardware.
  2. Cutting and Shaping: Precisely cut all components to size. If using dovetail joints, employ a dovetail jig or router to create accurate joinery.
  3. Carving (Optional): Use chisels to carve decorative elements or intricate patterns into the cabinet’s surfaces.
  4. Assembly: Join the cabinet components using dovetail joints or other joinery techniques. Ensure a snug and accurate fit for a robust construction.
  5. Finishing: Sand thoroughly to create a smooth surface. Apply your chosen stain or paint, and finish with a sealant for protection.
  6. Hardware: Install hinges, drawer slides, and knobs or handles, choosing unique pieces to complement the design.

Tips for Success

  • Start Simple: Begin with beginner-friendly projects to gain confidence and build your skills.
  • Invest in Quality Tools: Good tools make a difference in precision and results.
  • Practice Safe Techniques: Always prioritize safety by using proper tools and techniques.
  • Plan Ahead: Sketch your design, gather materials, and consider the steps involved before starting.
  • Don't Be Afraid to Ask for Help: There are many resources available online and in woodworking communities for guidance.

Building bedside cabinets is a rewarding endeavor for new woodworkers. As you progress through these projects, you'll gain experience, develop your skills, and create beautiful and functional pieces that enhance your home. Remember to enjoy the process, learn from your experiences, and embrace the challenges and rewards of woodworking.

Read more

Downloadable DIY Squirrel Box Blueprint

,
Downloadable DIY Squirrel Box Blueprint

Building a Squirrel Box: A DIY Guide for Your Backyard Buddies

Want to add a touch of wild charm to your backyard? A squirrel box is a fantastic way to attract these playful creatures and provide them with a safe and cozy shelter. This DIY project is perfect for anyone with basic woodworking skills and a love for nature. Let's get started!

Materials You'll Need

Here's what you'll need to gather before you start building your squirrel box:

  • Wood: Choose a weather-resistant wood like cedar, redwood, or pressure-treated pine. You'll need about 10-12 board feet of lumber for a standard-sized box.
  • Screws: Use galvanized or stainless steel screws for durability. You'll need about 20-30 screws of various lengths.
  • Drill: A cordless drill with a variety of drill bits is essential.
  • Saw: A circular saw or hand saw will be needed to cut the wood.
  • Tape measure: For accurate measurements.
  • Pencil: For marking the wood.
  • Clamps: To secure the wood while you're working.
  • Safety glasses: Protect your eyes while sawing and drilling.
  • Optional:
    • Staining or painting: To enhance the look and protect the wood.
    • Roofing shingles: For a more durable and weather-resistant roof.
    • Hardware cloth: For ventilation and to prevent predators from accessing the box.
    • Bird feeder or suet cage: To provide food for your furry friends.

Building the Squirrel Box

Now for the fun part - building the squirrel box! Follow these steps carefully:

1. Cut the Wood

Start by cutting the wood to size. Refer to the downloadable blueprint for the exact dimensions. You'll need to cut pieces for:

  • Front and Back Panels: Two identical pieces.
  • Side Panels: Two identical pieces.
  • Bottom Panel: One piece.
  • Roof: Two identical pieces (optional: you can use a single piece of plywood for the roof).
  • Entrance Hole: Cut a 4-5 inch diameter hole in the front panel for the squirrel's entrance.

2. Assemble the Box

Use screws to secure the front and back panels to the side panels, creating the main box structure. Make sure to use screws long enough to reach through the wood and into the next piece. Next, attach the bottom panel to the base of the box.

Pro Tip: For added strength, you can use wood glue in addition to screws.

3. Add the Roof

There are a few ways to add the roof.

  • Option 1: If you're using two separate roof pieces, attach them to the top of the box, creating a slight overhang to help with drainage. Secure them with screws or hinges.
  • Option 2: For a more simple roof, use a single piece of plywood and secure it to the top of the box using screws.

Optional: To add a more finished look, you can attach roofing shingles to the roof. This will help to protect the wood from the elements.

4. Add Ventilation

It's crucial to provide adequate ventilation for the squirrels. You can do this by cutting small holes in the back and/or side panels using a drill. Or, you can attach a piece of hardware cloth to the back or bottom of the box for additional ventilation and predator protection.

5. Finishing Touches

If you wish, stain or paint the box to give it a more attractive look and to help preserve the wood. Make sure to choose a non-toxic paint that is safe for wildlife.

6. Installation

Find a suitable location for your squirrel box. Look for a spot that's protected from the elements and predators. Secure the box to a tree using heavy-duty screws or brackets, or attach it to a post or sturdy structure. The box should be placed around 6-10 feet above the ground.

Tips for Attracting Squirrels

Once your squirrel box is installed, there are a few things you can do to attract your furry friends:

  • Offer Food: Squirrels love nuts, seeds, and fruits. You can place a bird feeder near the box, or even a small bowl of food on the ground.
  • Provide Water: Squirrels need water, just like any other animal. Place a shallow dish of water near the box, especially during hot weather.
  • Be Patient: It may take a little while for squirrels to discover your box. Don't get discouraged if you don't see them right away.
  • Avoid Disturbances: Try to keep the area around the box quiet and peaceful. Avoid making sudden movements or loud noises that could scare them away.

Enjoy Watching Your New Backyard Residents

Building a squirrel box is a rewarding project that will add a touch of nature to your backyard. You'll have hours of enjoyment watching these curious and entertaining creatures as they come and go from their new home. Plus, you'll be giving them a safe and comfortable place to rest, nest, and raise their young.

Remember, building a squirrel box is a great way to connect with nature and bring some wildlife into your own backyard. Have fun with the project, and enjoy watching the squirrels explore their new home!

Read more

How to Build a Tall Birdhouse with a Classic Design

,
How to Build a Tall Birdhouse with a Classic Design

Building a Tall Birdhouse with Classic Charm

Hey there, bird lovers! Ready to give our feathered friends a stylish and spacious home? Today, we're going to build a tall, classic birdhouse that will look great in your garden and provide a cozy haven for birds of all sizes. Let's get our hands dirty!

Gathering Your Supplies

First things first, we need to gather our materials. You can find most of these at your local hardware store or online:
  • One piece of 1x6-inch pine board, 8 feet long (for the sides, roof, and base)
  • One piece of 1x4-inch pine board, 8 feet long (for the front and back)
  • One piece of 1/4-inch plywood, 12 inches by 12 inches (for the roof overhang)
  • Two 4-inch long wood screws for attaching the front and back to the sides
  • Two 1.5-inch long wood screws for attaching the roof to the sides
  • 12-inch long wood screws for attaching the base to the sides (length may vary depending on the thickness of the base)
  • Wood glue
  • Wood stain or paint (optional)
  • Weatherproof sealant (optional)
  • Measuring tape
  • Saw (hand saw or circular saw)
  • Drill with a 3/16-inch drill bit
  • Screwdriver
  • Clamps
  • Pencil

Building the Birdhouse Base

Let's start with the base. This will provide a sturdy foundation for our birdhouse:
  1. Cut two pieces of the 1x6-inch board to 6 inches in length. These will be the sides of the base.
  2. Cut one piece of the 1x6-inch board to 5 inches in length. This will be the back of the base.
  3. Cut one piece of the 1x6-inch board to 4 inches in length. This will be the front of the base. Make sure to center the front piece on the back piece before attaching them.
  4. Use wood glue and 12-inch long wood screws to attach the sides, front, and back to create a rectangular box.

Creating the Birdhouse Walls

Now we'll build the walls of our birdhouse:
  1. Cut two pieces of the 1x6-inch board to 12 inches in length. These will be the sides of the birdhouse.
  2. Cut two pieces of the 1x4-inch board to 6 inches in length. These will be the front and back of the birdhouse.
  3. Use wood glue and 4-inch long wood screws to attach the front and back to the sides, creating a box. You can choose to leave the front open for easy access, or create a small entrance for your birdhouse.
  4. Use wood glue and 12-inch long wood screws to attach the birdhouse box to the base. Make sure the base is centered and the sides are flush with the base.

Crafting the Roof

Time to add the roof, giving our birdhouse a classic touch:
  1. Cut two pieces of the 1x6-inch board to 8 inches in length. These will be the two sides of the roof.
  2. Cut one piece of the 1x6-inch board to 6 inches in length. This will be the front of the roof.
  3. Cut one piece of the 1x6-inch board to 7 inches in length. This will be the back of the roof.
  4. Use wood glue and 1.5-inch long wood screws to attach the front and back to the sides, creating a triangular roof shape.
  5. Use wood glue and 1.5-inch long wood screws to attach the roof to the top of the birdhouse walls, making sure the sides of the roof overhang the sides of the birdhouse slightly.

Adding a Roof Overhang

Let's create a classic overhang for our roof:
  1. Cut a piece of the 1/4-inch plywood to 5 inches by 7 inches.
  2. Attach the plywood to the front of the roof overhang, making sure it's flush with the bottom edge of the roof. Use wood glue and a few 1.5-inch wood screws.
  3. Repeat step 2 on the back of the roof overhang.

Finishing Touches

We're almost there! Let's personalize our birdhouse:
  1. Sand down any rough edges with sandpaper. This will give the birdhouse a smooth and polished look.
  2. If desired, you can stain or paint the birdhouse with your favorite color. Choose weatherproof paints and stains that are safe for birds. Make sure to let the paint dry completely before proceeding to the next step.
  3. Apply a layer of weatherproof sealant to protect the wood from the elements. This will help your birdhouse last for years to come.

Choosing the Right Location

Now it's time to find the perfect spot for your birdhouse:
  • Choose a safe location: Make sure your birdhouse is placed in a location that is safe from predators like cats, snakes, and squirrels.
  • Provide shelter: The birdhouse should be placed in an area that offers some shelter from the elements, such as under a tree or near a bush.
  • Offer visibility: The birdhouse should be placed in a location that is visible to birds. A spot that is open and not surrounded by dense foliage is ideal.
  • Consider height: Aim for a height of 5-8 feet above the ground. This will prevent predators from easily reaching the birdhouse.
  • Secure the birdhouse: Attach the birdhouse to a tree or post with sturdy screws or wire. This will prevent the birdhouse from blowing away or being knocked down by strong winds.

A Few Final Tips

  • Keep it clean: Clean your birdhouse regularly to prevent the buildup of droppings and parasites. This will help keep your birdhouse healthy and attract more birds.
  • Be patient: Birds may take some time to find and get used to your new birdhouse. Don't be discouraged if it takes a while for them to move in.
  • Enjoy the show: Once birds start using your birdhouse, you'll have a front-row seat to the fascinating world of birdlife in your own backyard.
So there you have it! A classic, tall birdhouse that is sure to attract a wide variety of feathered friends to your garden. Remember, building a birdhouse is a rewarding experience, and it's a great way to connect with nature and provide a safe haven for these amazing creatures. Happy building and enjoy watching your birdhouse come to life!
Read more

Easy Cold Frame Plans for Seed Starting

,
Easy Cold Frame Plans for Seed Starting

Easy Cold Frame Plans for Seed Starting

Hey there, fellow gardeners! Are you tired of those fickle spring weather patterns always throwing a wrench in your planting plans? Want to get a head start on the growing season and enjoy bountiful harvests sooner? Then building a cold frame is the way to go! It's like a mini-greenhouse for your seedlings, giving them the perfect environment to thrive before you transplant them outside. And the best part? You can whip one up with some basic materials and a little DIY know-how. Let's dive into some easy cold frame plans that will have you growing your own seedlings in no time!

Choosing Your Cold Frame Material

First things first, let's talk about the foundation of your cold frame. You can get creative here, but remember, it needs to be sturdy enough to withstand the elements and provide a protective barrier for your precious seedlings.

Wooden Cold Frames

Wood is a classic choice for cold frames, offering a natural look and excellent insulation. You can use leftover lumber from other projects, giving those forgotten pieces a new lease on life! Just make sure to use pressure-treated wood for the base to prevent rot, especially if you're placing it directly on the ground.

Plastic Cold Frames

For a more budget-friendly and lightweight option, consider using clear plastic. You can find ready-made cold frame kits at garden centers or online, or get creative with repurposed plastic containers like large storage tubs or even old windows! Just be sure the plastic is UV-resistant to prevent it from breaking down in the sun.

Metal Cold Frames

Want something durable and long-lasting? Metal cold frames, often made from galvanized steel, are a great option. They're strong enough to handle heavy winds and harsh weather conditions, making them ideal for regions with unpredictable climates. Plus, they're typically easy to assemble and dismantle, so you can store them away when not in use.

Building Your Cold Frame

Now that you've chosen your material, let's get down to the nitty-gritty of building your cold frame. Remember, the key is to create a structure that traps warmth and provides good ventilation. Here are some basic steps to follow:

1. Decide on the Size

Think about the number of seedlings you'll be growing and the space available in your garden. A small cold frame (around 3 feet by 4 feet) is perfect for starting a few trays of seeds. For larger gardens, you can go for a bigger frame, even up to 6 feet by 8 feet!

2. Prepare the Base

If you're using wood, construct a rectangular frame using 2x4s or 2x6s. Make sure the bottom is level and sits slightly elevated off the ground to allow for drainage. For plastic or metal frames, you can use a pre-made base or build one with bricks or cinder blocks. Just ensure it's sturdy and provides a solid foundation for your frame.

3. Create the Lid

The lid is crucial for controlling the temperature and light inside your cold frame. If you're using wood, you can build a hinged lid with 1x2s and plywood. For plastic, you can use clear polycarbonate sheets or old windows, attaching them to a simple wooden frame with hinges and latches. Metal frames typically come with a pre-made lid, but you can always customize it with additional ventilation openings if needed.

4. Add Ventilation

To prevent your seedlings from overheating, you'll need to incorporate ventilation into your cold frame. You can add simple vents along the sides or top of the lid using screens, louvers, or even just strategically placed pieces of wood. Remember, good air circulation is essential for healthy plant growth.

5. Position Your Cold Frame

Place your cold frame in a sunny spot that receives at least 6 hours of direct sunlight each day. Avoid areas that are prone to strong winds or drafts. Make sure the base is level and the lid is securely fastened. You may want to consider adding a layer of landscaping fabric or burlap on the ground beneath the frame to help with drainage and prevent weeds from growing up inside.

Maintaining Your Cold Frame

Once you've built your cold frame, it's time to put it to work! Here are a few tips to keep your seedlings thriving:

1. Start Your Seeds

Fill trays or pots with seed-starting mix and sow your seeds according to the instructions on the seed packets. Water gently and place the trays inside your cold frame.

2. Monitor the Temperature

Keep a close eye on the temperature inside your cold frame. You want it to stay between 50°F and 70°F during the day, and no lower than 40°F at night. You can adjust the ventilation to regulate the temperature. If it gets too cold, cover the frame with a blanket or bubble wrap for added insulation.

3. Provide Adequate Light

Your seedlings need at least 6 hours of sunlight per day. If you're in a shady location or your cold frame doesn't receive enough direct sunlight, supplement with grow lights. You can find affordable grow lights at most garden centers or online.

4. Water Regularly

Check the moisture levels in your cold frame daily and water as needed. Avoid overwatering, which can lead to root rot. Use a watering can with a fine rose to gently water the soil, and never let the seedlings become soggy.

5. Harden Off Your Seedlings

Before transplanting your seedlings outside, you need to gradually acclimate them to the cooler temperatures and stronger sunlight. This process is called "hardening off." Start by opening the lid of your cold frame for a few hours each day, gradually increasing the amount of time over several days. Once your seedlings can withstand full sun and outdoor temperatures for a few days, they're ready to be planted in your garden.

Enjoying Your Cold Frame

Building a cold frame is a fun and rewarding project. Not only will it help you get a jump start on the growing season, but it will also give you a sense of accomplishment and a deeper connection to your garden. So grab some tools, gather some materials, and get ready to create your own mini-greenhouse! Happy gardening!

Read more

How to Build Your Own Bedside Cabinet: A BeginnerÂ’s Guide

,
How to Build Your Own Bedside Cabinet: A Beginner’s Guide

How to Build Your Own Bedside Cabinet: A Beginner's Guide

Tired of generic bedside tables? Do you dream of a piece of furniture that perfectly matches your bedroom décor? Building your own bedside cabinet is a rewarding project that allows you to unleash your creativity and craft a unique piece of furniture that complements your personal style. This beginner's guide will walk you through the process, step by step, so you can create a bedside cabinet you'll cherish for years to come.

Planning and Design

Before you start cutting wood, take some time to plan and design your bedside cabinet. Consider these factors:

Size and Dimensions:

Measure the space you have available and determine the ideal dimensions for your bedside cabinet. Ensure it fits comfortably beside your bed and offers ample storage for your essentials.

Style and Design:

Decide on the overall style of your bedside cabinet. Do you prefer a modern, sleek design, a rustic farmhouse style, or something more traditional? Consider the overall theme of your bedroom and choose a style that complements it.

Materials:

Choose the wood or other materials for your bedside cabinet. Popular choices include plywood, MDF, pine, or oak. Factor in the cost, durability, and aesthetic appeal of each option.

Drawings and Plans:

Create a detailed drawing or use pre-made plans to guide your construction. This will help you visualize the finished product and ensure all the parts fit together properly.

Gathering Your Tools and Materials

Once you have your design finalized, gather the necessary tools and materials for your project.

Tools:

A well-equipped workshop is essential for a successful build. Make sure you have the following tools:

  • Table saw or circular saw
  • Miter saw
  • Drill/Driver
  • Sandpaper (various grits)
  • Clamps
  • Measuring tape
  • Level
  • Safety glasses
  • Dust mask
  • Ear protection

Materials:

Your materials will depend on your specific design. Here's a general list:

  • Wood (plywood, MDF, or solid wood)
  • Screws
  • Wood glue
  • Finishing nails
  • Wood filler
  • Paint or stain (optional)
  • Hardware (hinges, drawer slides, knobs)

Construction: Bringing Your Design to Life

Now, the fun part! Use your plans or drawings to guide you as you cut and assemble your bedside cabinet.

Cutting the Wood:

Carefully cut the wood to the precise dimensions outlined in your plans. Use a miter saw for angled cuts and a table saw for straight cuts.

Assembling the Cabinet:

Attach the sides, top, and bottom of the cabinet using wood glue and screws. Use clamps to hold the pieces together while the glue dries. If you are building drawers, follow the instructions for assembling those.

Adding Drawers or Shelves:

Create drawers using plywood or MDF and attach drawer slides to ensure smooth operation. Install shelves using shelf supports for added storage.

Finishing Touches:

Once the cabinet is assembled, fill any holes or gaps with wood filler. Sand the entire piece with progressively finer grits of sandpaper to achieve a smooth finish. Apply paint or stain, depending on your desired aesthetic.

Installing Hardware:

Attach hinges, drawer slides, knobs, and other hardware to complete your bedside cabinet.

Tips and Tricks

To ensure a successful build, keep these tips in mind:

  • Measure twice, cut once. Accuracy is crucial for a well-made cabinet.
  • Use safety glasses, ear protection, and a dust mask when working with power tools.
  • Clamp your workpieces firmly during assembly to prevent movement.
  • Sand your wood thoroughly before painting or staining to create a smooth surface.
  • Consider using a pre-stain conditioner to ensure even stain application.
  • Let paint or stain dry completely before installing hardware.

Conclusion: A Bedside Cabinet You'll Love

Building your own bedside cabinet is a rewarding DIY project that allows you to create a custom piece of furniture that perfectly reflects your personal style. By following this beginner's guide, you can confidently embark on your woodworking journey and craft a bedside cabinet that you'll love for years to come.

Read more

Detailed Cold Frame Plans for Beginners

,
Detailed Cold Frame Plans for Beginners

Detailed Cold Frame Plans for Beginners

Are you ready to extend your growing season and give your plants a head start? Building a cold frame is a rewarding and relatively simple project, perfect for beginner gardeners. This guide will walk you through the steps of building a cold frame, from choosing materials to assembling the structure. By the end, you'll be well on your way to cultivating healthy seedlings and enjoying a longer harvest.

Choosing Your Cold Frame Style

The first step is to decide what kind of cold frame suits your needs and space. There are two main styles:

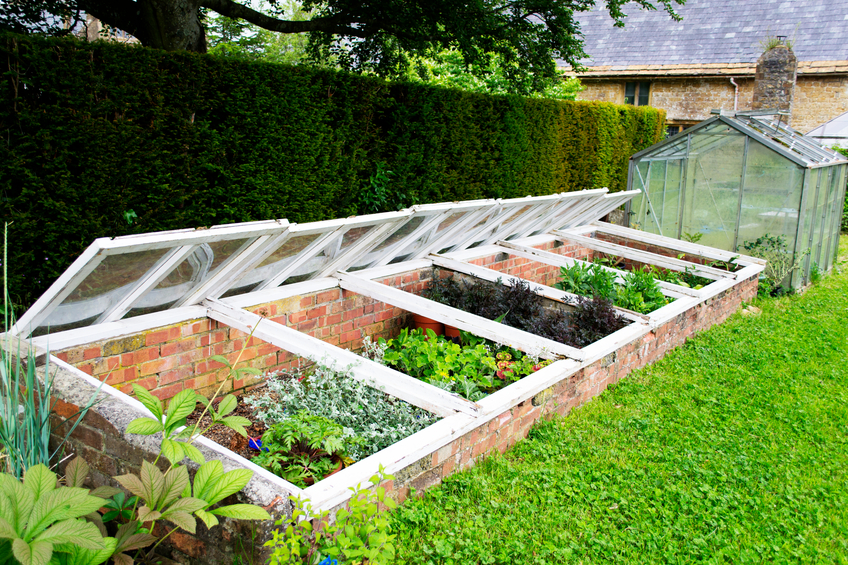
  • Lean-to cold frames are simple to build and often attached to existing structures like walls or fences, making them great for small gardens.
  • Freestanding cold frames provide more flexibility in placement and offer a more substantial structure.

Consider the following factors:

  • Space available: How much room do you have?
  • Sunlight exposure: Choose a location that receives ample sunlight, ideally facing south.
  • Materials: What are you comfortable working with?
  • Budget: How much are you willing to spend?

Gathering the Materials

Once you've selected your cold frame style, gather the necessary materials. You'll need:

  • Frame materials: This could be wood, metal, or even recycled materials like pallets.
  • Glazing material: Use polycarbonate panels, glass, or even salvaged windows.
  • Fasteners: Screws, nails, and hinges.
  • Optional materials: Soil, drainage material, a thermometer, and a small fan for ventilation.

Building a Simple Lean-to Cold Frame

For this example, we'll focus on building a simple lean-to cold frame using wood. You can easily adapt this plan to use other materials.

Step 1: Create the Base

Build a rectangular base using sturdy lumber. The length and width of your base will determine the size of your cold frame. Make sure the base is level and stable.

Step 2: Build the Sides

Cut and attach upright side panels to the base. You can use wood planks or even sturdy cardboard for this step. Ensure the side panels are tall enough to accommodate your plants and have a slight angle towards the south, allowing for optimal sunlight.

Step 3: Construct the Lid

Create a lid frame using wood that is slightly larger than the base. Attach hinges to one side of the lid frame to allow for easy opening and closing. You can use a variety of materials for the glazing, such as polycarbonate panels or glass. Secure the glazing to the lid frame using weather stripping or caulk.

Step 4: Finish and Place

Once the lid is attached, you can finish the cold frame by painting or staining the wood. Then, place the cold frame in your chosen sunny location.

Tips for Using Your Cold Frame

Your cold frame is ready to go, but here are some tips to ensure success:

  • Fill it with soil: Use a well-draining potting mix or a blend of garden soil and compost.
  • Start seeds indoors: Begin your seeds indoors and transplant them to the cold frame once they are a few weeks old and the threat of frost has passed.
  • Monitor temperatures: During cold nights, cover the cold frame with a blanket for extra insulation.
  • Ventilate daily: Open the lid to allow fresh air to circulate and prevent moisture buildup.
  • Water regularly: Keep the soil consistently moist but not soggy.

A cold frame is a wonderful tool for extending your growing season and nurturing healthy plants. With a little time and effort, you can build one yourself and start enjoying its benefits.

Read more

Simple Guide to Making a Cold Frame for Vegetables

,
Simple Guide to Making a Cold Frame for Vegetables

A Simple Guide to Building a Cold Frame for Your Garden

A cold frame is an excellent way to extend your gardening season and provide a safe haven for your tender seedlings. They create a mini-greenhouse effect, trapping warmth from the sun and protecting your plants from harsh weather conditions. Building a cold frame yourself is a straightforward project that requires minimal tools and materials. Let's dive into the simple steps to create your own cold frame and watch your garden flourish!

Choosing the Right Location and Design

Before you start building, pick the right spot for your cold frame. It should receive ample sunlight, ideally facing south for maximum warmth. Consider the size you need, based on the plants you intend to grow. You can choose a simple, rectangular design or opt for a more complex, angled design for better ventilation. The key is to pick a design that aligns with your gardening needs and the available space in your garden.

Gathering the Materials

The beauty of a cold frame is its simplicity. You can build it using readily available materials. Here's what you'll need:

  • Wooden planks or lumber for the frame
  • Glass, polycarbonate panels, or clear plastic sheeting for the cover
  • Screws or nails
  • Hinges (optional, for a hinged lid)
  • Soil or potting mix

You can customize the size and materials based on your budget and preferences. For example, you can use recycled windows or old doors for the cover, adding a rustic charm to your cold frame.

Building the Frame

Now comes the fun part! Start by measuring and cutting the wood for the frame according to your chosen design. Ensure the pieces are cut accurately for a secure and stable structure. Assemble the frame using screws or nails, ensuring the corners are tight and secure.

Once the frame is complete, attach the hinges to the lid if you're using a hinged design. For a simpler approach, create a removable lid by attaching the cover material to a separate frame using screws or nails.

Creating the Cover

Now, it's time to add the cover that will trap the warmth. For best results, choose a transparent material that allows maximum sunlight penetration. If using glass, ensure it's tempered for safety. Polycarbonate panels or clear plastic sheeting offer excellent durability and are readily available.

Securely attach the cover material to the frame using screws, nails, or a strong adhesive. You can use rubber seals or weather stripping to ensure a tight fit and prevent drafts. Remember to leave some ventilation for air circulation, especially on hot days.

Preparing the Soil and Planting

Before planting, fill the cold frame with good quality soil or potting mix. Choose a mix suitable for the plants you'll be growing. If you're starting seeds, sow them directly in the soil according to their specific requirements.

For seedlings, gently transplant them from their starter pots to the cold frame, ensuring the roots are not disturbed. Water the plants thoroughly after planting, making sure the soil is moist but not soggy.

Maintaining Your Cold Frame

With your cold frame in place, it's time to enjoy the benefits of extended gardening. Here's how to keep your cold frame thriving:

  • Regularly monitor the temperature: The temperature inside your cold frame can fluctuate, so it's essential to keep an eye on it, especially during extreme weather conditions.
  • Ventilate when needed: Open the lid or vents to release excess heat, especially on sunny days.
  • Water as needed: Check the moisture levels of the soil regularly and water your plants thoroughly when they need it.
  • Protect from pests and diseases: Keep an eye out for any signs of pests or diseases and take immediate action to control them.

By following these simple steps, you'll have a flourishing cold frame that will extend your gardening season and provide you with a bountiful harvest. Enjoy the joy of growing your own fresh produce, and Happy Gardening!

Read more

Building a Cold Frame for Less Than $50

,
Building a Cold Frame for Less Than $50

Build a Cold Frame for Less Than $50

Do you want to give your garden a head start in the spring or extend the growing season into the fall? Then build a cold frame! This simple structure can help protect your plants from the elements and provide them with a warm, sheltered environment for growth.

And the best part? You can build a cold frame for less than $50. That's right - you don't need a lot of money to build a simple cold frame that will get the job done.

Here's what you'll need:

Materials

  • Wooden pallets: These are readily available for free or very cheap at many businesses. Use sturdy pallets in good condition.
  • 2x4s: These will form the frame of your cold frame. You'll need enough to create a rectangle or square that's the size you want.
  • Screws or nails: Use whatever you have on hand.
  • Plastic sheeting or greenhouse film: This will act as the cover for your cold frame. Choose a material that is strong and durable.
  • Hinges: These will be used to attach the cover to the frame.
  • Heavy-duty clips or clamps: These will be used to secure the cover to the frame in windy conditions.
  • Optional: Soil, seeds, and starter plants.

Building the Cold Frame

Follow these simple steps to create your cold frame.

Step 1: Build the base.

Take two wooden pallets and place them side by side. Use the 2x4s to create a frame that extends the length of the pallets. Make sure the frame is level and secure it to the pallets with screws or nails. If your pallets are very wide, you can cut them in half to create a more manageable size.

Step 2: Construct the lid.

Use the 2x4s to build a frame for the lid of your cold frame. It should be the same size as the base. You can use the same pallets to build the lid, just cut them into a rectangle.

Step 3: Attach the lid.

Attach the lid to the base of your cold frame using hinges. This will allow you to easily open and close the lid to access your plants.

Step 4: Cover the lid.

Cover the lid of your cold frame with your chosen plastic sheeting or greenhouse film. Secure the cover to the lid with heavy-duty clips or clamps.

Step 5: Finish the frame.

Use some soil to fill the cold frame. You can add extra potting soil to the base if desired, or use the soil already found in the pallets. Then you're ready to plant!

Using your cold frame

Once your cold frame is built, you can start using it to grow your plants. Here are a few tips:

  • Choose plants that are appropriate for the climate you live in.
  • Keep the soil moist but not waterlogged. Water your plants regularly.
  • Open the lid of your cold frame on warm days to ventilate the plants.
  • Close the lid at night to protect your plants from frost.
  • If you live in an area with harsh winters, you may need to cover your cold frame with an extra layer of insulation.

That's it! You can use your cold frame to extend your growing season and start your garden plants early in the spring. It's a simple, inexpensive, and rewarding project that will give you a head start on gardening.

Read more

Cold Frame Building Plans for Small Spaces

,
Cold Frame Building Plans for Small Spaces

Cold Frame Building Plans for Small Spaces

A cold frame is an invaluable tool for gardeners of all levels, providing a protected environment for starting seeds, nurturing seedlings, and extending the growing season. Especially in smaller spaces, where garden real estate is at a premium, a cold frame can be a game-changer. This article delves into the construction of cold frames specifically designed for limited areas, offering detailed plans, materials, and techniques to maximize space and functionality.

Understanding Cold Frames and Their Benefits

A cold frame essentially acts as a mini-greenhouse, leveraging sunlight and the natural insulation of the earth to create a warmer, more controlled microclimate. Its basic structure typically comprises a clear, transparent cover (often glass or polycarbonate) mounted on a sturdy frame. This design allows sunlight to penetrate, warming the interior, while the enclosed space retains heat and protects delicate plants from harsh weather conditions.

Advantages of Cold Frames

Cold frames offer numerous benefits for small gardens:

  • Extended Growing Season: They allow you to start seeds earlier in the spring and extend the growing season into the fall, even in cooler climates.
  • Protection from Weather: They shield plants from frost, wind, and heavy rain, creating a safe haven for delicate seedlings and young plants.
  • Enhanced Seedling Development: The controlled environment promotes healthy growth, reducing stress and encouraging robust root systems.
  • Space Efficiency: Cold frames can be easily adapted to fit small spaces, making the most of limited garden areas.
  • Lower Costs: They are generally more affordable than traditional greenhouses, especially when building your own.

Choosing the Right Cold Frame Design

When selecting a cold frame design for a small space, several factors are crucial:

Size and Shape

Consider the available space and the types of plants you intend to grow. Smaller, rectangular cold frames are ideal for tight areas, while curved or arched designs can maximize sunlight penetration.

Material and Construction

Wooden frames offer versatility and durability, while metal frames provide greater stability. The covering material can be glass, polycarbonate panels, or even clear plastic sheeting.

Ventilation

Adequate ventilation is essential to prevent overheating. Choose a design with vents or windows that can be adjusted to regulate air flow.

Location and Orientation

Position the cold frame in a sunny spot with good drainage. Orient it so that the longest side faces south to maximize sunlight exposure.

Cold Frame Building Plans for Small Spaces

Here are detailed plans for a simple yet effective cold frame suitable for small gardens:

Materials

  • 2x4 lumber (pressure-treated for longevity)
  • 1/2-inch plywood or exterior-grade OSB
  • Clear polycarbonate panels (4' x 8') or glass sheets
  • Exterior-grade wood screws
  • Weather-resistant wood glue
  • Hardware cloth (optional for added protection)
  • Hinges (for the lid)
  • Handles (for opening and closing the lid)
  • Silicone sealant or weatherstripping
  • Paint or stain (optional for a finished look)

Tools

  • Saw (circular, miter, or hand saw)
  • Drill with various drill bits
  • Screwdriver
  • Tape measure
  • Level
  • Hammer
  • Clamps
  • Safety glasses and gloves

Construction Steps

1. Frame Assembly:

  • Cut the 2x4 lumber to create the frame dimensions. For a small cold frame, consider a base of 3' x 4' and a lid with slightly larger dimensions for overhang.
  • Use wood glue and screws to assemble the frame pieces, forming a rectangle for the base and a similar frame for the lid. Be sure to make the lid frame slightly larger to allow it to sit on top of the base.
  • For added strength, use corner braces or double the 2x4 lumber at the corners.

2. Base Construction:

  • Cut plywood or OSB to fit the inside dimensions of the frame. This will form the base floor.
  • Secure the plywood to the frame using screws and wood glue. You can also add additional supports to prevent sagging if needed.

3. Lid Construction:

  • Cut polycarbonate panels or glass sheets to fit the inside dimensions of the lid frame.
  • Attach the panels or glass to the lid frame using screws or a glazing system, ensuring a secure and weatherproof seal. You may need to use spacers to create an air gap between the panels and the frame for better insulation.
  • Use silicone sealant around the edges of the panels or glass to prevent drafts and water leaks.

4. Hinges and Handles:

  • Attach hinges to the back edge of the lid frame. Choose hinges that are sturdy enough for the weight of the lid.
  • Install handles on the front of the lid for easy opening and closing.

5. Ventilation:

  • For ventilation, incorporate vents or windows into the lid. You can cut holes in the polycarbonate or glass and attach simple wood frames with removable panels or use commercial venting systems.

6. Optional Extras:

  • Hardware Cloth: Add hardware cloth around the base to deter rodents and other pests from accessing the plants.
  • Painting or Staining: Protect the wood frame by painting or staining it with a weather-resistant finish.

Using Your Cold Frame

Once your cold frame is built, here are some tips for using it effectively:

  • Choose the Right Plants: Cold frames are ideal for starting vegetables like lettuce, spinach, broccoli, carrots, and herbs. They can also be used to overwinter delicate perennials.
  • Watering and Ventilation: Regularly check the moisture levels and adjust ventilation to prevent overheating or excessive moisture.
  • Protection from Pests: Monitor for pests and take steps to control them early.
  • Hardening Off: Before transplanting seedlings into the garden, gradually acclimate them to the outdoor environment by slowly increasing exposure to sun and wind.

Conclusion

Building a cold frame for a small space is a relatively simple and affordable project that can significantly enhance your gardening experience. By utilizing the principles of sunlight, insulation, and controlled ventilation, you can create a thriving microclimate that fosters healthy plant growth and extends the growing season. Whether you're a novice gardener or a seasoned green thumb, a cold frame can be a valuable asset for your small garden, allowing you to enjoy a more bountiful and diverse harvest throughout the year.

Read more

Simple and Effective Squirrel Box Plans for Starters

,
Simple and Effective Squirrel Box Plans for Starters

Simple and Effective Squirrel Box Plans for Starters

Hey there, nature lovers! Want to attract some adorable squirrels to your backyard? Building a squirrel box is a fun and rewarding project that can bring a touch of wild charm to your outdoor space. Even if you're a complete beginner when it comes to woodworking, don't worry â€" these plans are super easy to follow. Let's dive in and make your own squirrel haven!

Getting Started: What You'll Need

Before you start hammering and sawing, gather your materials. You'll need:

  • Wood: Choose a rot-resistant wood like cedar or redwood. You'll need around 6-8 board feet for a basic squirrel box.
  • Screws: Use 1 1/4-inch or 2-inch screws for securing the wood.
  • Saw: A circular saw or a hand saw will work for cutting the wood.
  • Drill: You'll need a drill for pre-drilling holes before screwing.
  • Measuring Tape: Essential for making accurate cuts and ensuring everything fits perfectly.
  • Level: To make sure your box is straight and level.
  • Sandpaper: To smooth out any rough edges.
  • Paint or Stain: Optional, but adding a coat of paint or stain will help protect the wood and enhance the look.
  • Safety Glasses: Always wear safety glasses when working with power tools.

Step-by-Step: Building Your Squirrel Box

Now that you have your tools and materials ready, let's get building!

1. Cut the Wood

Start by cutting the wood according to these measurements:

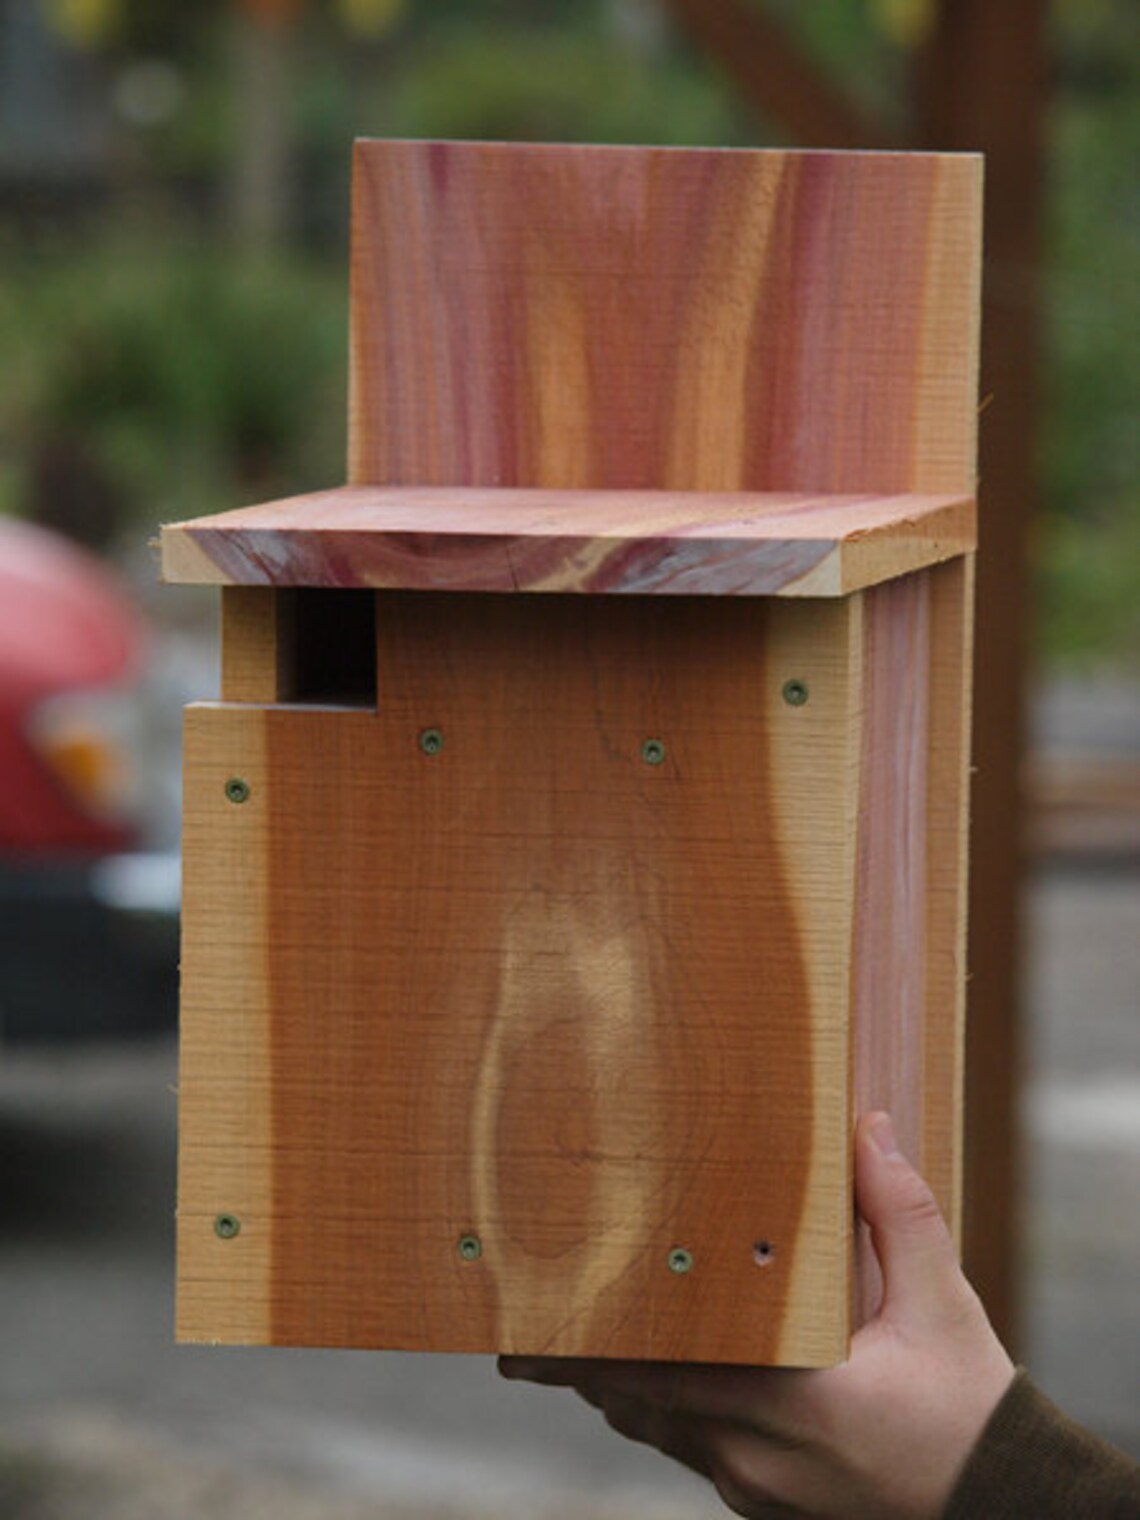
  • Front and Back Panels: 12 inches wide x 8 inches high
  • Sides: 10 inches wide x 8 inches high
  • Top: 12 inches wide x 10 inches deep
  • Bottom: 12 inches wide x 10 inches deep
  • Entrance: 4 inches wide x 4 inches high (cut this out on one of the front panels)

2. Assemble the Box

Now it's time to put the box together.

  • Attach the Sides: Screw the two side panels to the back panel, making sure the bottom edges are flush.
  • Add the Front: Attach the front panel with the entrance cut-out to the sides, aligning it with the back panel.
  • Secure the Bottom: Screw the bottom panel to the sides and back panel.
  • Attach the Top: Screw the top panel to the sides and front panel, creating a hinged lid.

3. Finishing Touches

Your squirrel box is almost ready! Here are some final steps to make it perfect:

  • Sand the Edges: Use sandpaper to smooth out any rough edges or splinters.
  • Add a Roof: Optional, but you can add a slanted roof to protect the squirrels from rain by attaching a piece of wood angled over the top.
  • Paint or Stain: If you want to, paint or stain the box with a weather-resistant product.
  • Attach a Perch: You can add a small perch just below the entrance for squirrels to rest.
  • Choose a Location: Find a spot in your backyard that is sheltered from the elements, ideally in a tree or on a pole.

Tips for Attracting Squirrels

You've built the perfect squirrel box, now it's time to attract some furry friends! Here are some tips:

  • Place it near a Food Source: Squirrels love nuts, seeds, and fruits, so try placing the box near a feeder or a tree with lots of nuts.
  • Provide Bedding Material: Fill the box with soft bedding material like shredded paper, cloth scraps, or dry leaves.
  • Be Patient: It may take some time for squirrels to discover and settle into the new box, but be patient and don't give up!

Enjoy Your New Squirrel Neighbors

Building a squirrel box is a fun and rewarding project. It's a great way to connect with nature and learn a new skill. Plus, watching playful squirrels scamper around your backyard is sure to bring a smile to your face. So, gather your materials, get building, and let the squirrel adventures begin!

Read more

Custom DIY Bedside Cabinet Plans for Every Style

,
Custom DIY Bedside Cabinet Plans for Every Style

Custom DIY Bedside Cabinet Plans for Every Style

Tired of the same old boring bedside cabinets? Do you yearn for a piece of furniture that perfectly complements your bedroom's unique style? Look no further! With a little creativity and some basic DIY skills, you can craft stunning bedside cabinets that will elevate your space and reflect your personal taste.

This guide provides detailed plans and inspiration to help you build custom bedside cabinets that fit your exact needs and aesthetic preferences. We'll explore various styles, materials, and construction techniques to ensure you create the perfect bedside companions for your dream bedroom.

Choosing the Right Style for You

The first step is deciding on a style that resonates with your personal taste and complements your existing bedroom decor. Here are some popular styles to consider:

Modern Minimalist

Embrace clean lines, simple forms, and neutral colors for a sophisticated and contemporary look. Consider using materials like plywood, metal, or acrylic to achieve a streamlined aesthetic.

Rustic Farmhouse

Create a cozy and inviting atmosphere with natural materials like reclaimed wood, distressed finishes, and metal accents. Think chunky legs, open shelves, and rustic hardware.

Mid-Century Modern

Celebrate the iconic designs of the mid-20th century with sleek lines, tapered legs, and warm wood tones. Consider incorporating geometric patterns and playful pops of color.

Industrial Chic

Embrace raw materials like metal, exposed brick, and concrete for a bold and edgy look. Think exposed pipes, industrial-style lighting, and vintage hardware.

Materials and Tools

Once you've chosen a style, select materials that align with your vision. Consider these options:

  • Wood: Plywood, MDF, pine, oak, walnut, and reclaimed wood are popular choices.
  • Metal: Steel, aluminum, and brass can add a modern or industrial touch.
  • Acrylic: This transparent material offers a sleek and contemporary look.

You'll also need the following tools:

  • Saw (circular, jigsaw, or miter saw)
  • Drill and drill bits
  • Screwdriver
  • Tape measure and pencil
  • Clamps
  • Sandpaper
  • Safety glasses and hearing protection

Step-by-Step Instructions

The specific steps for building your bedside cabinet will vary depending on your chosen style and materials. However, the general process involves these steps:

  1. Design and Planning: Sketch your design, determine the dimensions, and create a cut list for your materials.
  2. Cutting: Carefully cut your wood or other materials to size using your chosen saw.
  3. Assembly: Join the pieces using wood glue, screws, or other appropriate fasteners.
  4. Finishing: Sand your cabinet, apply paint or stain, and add hardware like knobs, hinges, or pulls.

Inspiration and Resources

To find inspiration and guidance, check out these resources:

  • Online Tutorials: YouTube, Pinterest, and woodworking blogs offer countless DIY bedside cabinet plans and tutorials.
  • Home Improvement Stores: Lumber yards and home improvement stores offer project plans, materials, and expert advice.
  • Books and Magazines: Browse woodworking books and magazines for detailed plans and inspiration.

Conclusion

Building your own bedside cabinets allows you to express your creativity and personalize your bedroom décor. Embrace the challenge and enjoy the satisfaction of crafting a unique piece of furniture that perfectly reflects your style. With these detailed plans and resources, you can create stunning bedside companions for your dream bedroom. So, grab your tools, unleash your inner craftsman, and embark on your bedside cabinet building journey!

Read more

Craft a mystical box: easy diy woodworking guide

,
Craft a mystical box: easy diy woodworking guide

Craft a Mystical Box: Easy DIY Woodworking Guide

Hey there, fellow crafters! Ever wanted to create something truly special, something that whispers of hidden secrets and ancient magic? Well, today we're diving into the world of DIY woodworking and building a mystical box that's not just functional, but also a piece of art with a touch of enchantment.

Why a Mystical Box?

This isn't just about making a plain ol' box. We're aiming for something that evokes a sense of wonder. Imagine:
  • A sturdy, handcrafted box holding your favorite trinkets, each one imbued with meaning and memory.
  • A hidden compartment within, designed to keep secrets safe from prying eyes.
  • Intricately carved details that tell a story, a whisper of magic woven into the wood itself.

It's a perfect project for anyone who enjoys woodworking, loves to express their creativity, and wants to add a touch of magic to their home decor. Plus, it makes a fantastic gift! Let's get started!

Gather Your Magical Supplies

Before we begin, let's gather our tools and materials. This list may seem a bit long, but remember, each item plays a role in creating the mystical magic we're aiming for!

Wood

  • Hardwood: Choose a hardwood like oak, walnut, or cherry for its strength and beautiful grain. The wood will be the foundation of our mystical box, so let's pick something durable and aesthetically pleasing!
  • Softwood (Optional): Consider a softwood like pine for the inner box, if you prefer a lighter touch and want to experiment with carving. Softwoods are easier to work with, but remember to use them for less exposed areas.

Tools

  • Saw: A handsaw, circular saw, or jigsaw will be used to cut the wood to size. If you're new to woodworking, a handsaw might be the most manageable!
  • Chisel and mallet: For carving intricate details. Choose a set of chisels of varying sizes for different carving techniques. Don't be intimidated, it's easier than you think!
  • Drill: For creating holes for hinges, latches, or any extra embellishments. Choose a drill with a variety of drill bits for precise work.
  • Sandpaper: Sandpaper of varying grits (fine, medium, coarse) will help smooth out surfaces and create a polished finish. Remember, smooth surfaces enhance the look of the wood.
  • Clamps: To securely hold pieces of wood together while you work. Clamps are your best friend for accurate assembly. You can't go wrong with a good set of clamps!
  • Measuring tape and ruler: For accurate measurements and cutting. Precision is key, so always double-check your measurements. You don't want to make any unwanted surprises!
  • Pencil: For marking and drawing on the wood. Don't forget to use a sharp pencil to create clear and precise markings.

Extras

  • Hinges: For attaching the lid to the box. Choose hinges that match the style and size of your box. Maybe even get some decorative hinges to add a touch of magic!
  • Latch or clasp: To keep the box securely closed. Opt for a design that fits the mystical theme. Think ornate lock and key, or perhaps a decorative clasp that hints at secrets within.
  • Wood glue: For assembling the box. Use a strong wood glue designed for durable bonds.
  • Wood finish: A clear sealant or stain to protect and enhance the wood's natural beauty. We're aiming for that magical, antique look. Choose a finish that complements your wood type and personal style.
  • Optional: Decorative embellishments like gemstones, beads, or even dried flowers. Add your own touch of magic by incorporating elements that speak to you.

Constructing Your Mystical Sanctuary

Now, let's get down to the nitty-gritty! We're about to bring our mystical box to life, piece by piece. Remember, take your time, enjoy the process, and let your creativity flow!

Step 1: The Base and Sides

  • Measure and cut the pieces for the base and sides of the box. You'll need two identical pieces for the base, and four pieces for the sides. Let's keep those measurements accurate!
  • Carefully join the sides to the base using wood glue and clamps. Make sure the corners are square and the joints are strong. Always use a level to ensure everything is even and steady.
  • Leave the glue to dry completely before moving on to the next step. Patience is key, my friend! Let that glue set properly.

Step 2: The Lid

  • Cut two pieces for the lid, ensuring they are slightly larger than the base of the box to create a snug fit. We want that lid to fit perfectly, yet offer easy access to the secrets within.
  • Join the lid pieces together using wood glue and clamps, just like we did with the base. Make sure the edges are aligned, and you have a strong, well-constructed lid.
  • Once the glue is dry, carefully sand the edges of the lid and base to ensure a smooth fit. You want a lid that opens and closes smoothly, like a gentle whisper of magic.

Step 3: Carve Your Magic

Now it's time to add some personal touch! If you're feeling adventurous, try carving intricate designs onto the box. This is where your creative spirit shines!

  • Use a pencil to sketch out your design onto the wood. This is your opportunity to let your imagination run wild! Think ancient symbols, mythical creatures, or even your own unique patterns.
  • Carefully carve the design using chisels and a mallet. Remember, practice makes perfect! Take your time, experiment with different carving techniques, and enjoy the process!
  • If you're new to carving, start with simple designs and gradually work your way up to more complex patterns. Don't be afraid to make mistakes! They're all part of the journey.

Step 4: Add the Finishing Touches

We're almost there! Let's complete our magical box with a touch of elegance and protection.

  • Sand the entire box and lid to create a smooth and polished finish. Remember, we're striving for that magical, almost antique look!
  • Apply a wood finish to protect the wood and enhance its natural beauty. Choose a clear sealant or a stain, depending on the look you want to achieve.
  • Attach the hinges to the lid and the box. Choose hinges that match the style and size of your box. Perhaps even decorative hinges for that extra touch of magic.
  • Add the latch or clasp to secure the lid. We've come a long way, and now our box is ready to hold its treasures!

Step 5: Embellishment and Enchantment

Here's where your imagination really takes flight! Decorate your mystical box with personal touches that speak to your magic. Think of it as a 'Spellcasting Workshop'!

  • Gemstones: Glue or attach gemstones to the box to add a touch of sparkle and mystical energy. Choose gemstones that hold special meaning to you, or that align with the theme of your box.
  • Beads: String beads around the edges of the box or attach them to the lid for a decorative and enchanting touch. Think of colors and patterns that evoke your magical intentions.
  • Dried Flowers: Press dried flowers and carefully glue them inside the lid, creating a delicate and fragrant touch. Choose flowers that symbolize love, peace, or any other intentions you wish to instill in your box.
  • Symbols and Inscriptions: Etch or carve symbols, runes, or meaningful inscriptions onto the wood to imbue your box with deeper meaning. These could be personal symbols, ancient scripts, or words of power that resonate with you.

The Magic Unveiled

Congratulations! You've just crafted a mystical box that's not just a beautiful object but also a vessel of your own creative energy and magical intentions. Every time you open it, you'll be reminded of the wonder you've created.

Remember, the magic of your box lies not just in its outward appearance but also in the stories you choose to fill it with. Let it be a place of dreams, secrets, and cherished memories. And most importantly, let it remind you of the magic you have within yourself.

Read more
 

Backyard incorp Copyright © 2016 -- Powered by Blogger